Rooting Pixel 4 — Flame
THIS WIPES ALL YOUR DATA ON THE PHONE. A BACKUP IS REQUIRED INCASE THIS PHONE IS NOT ONLY MEANT FOR TESTING.
When conducting a mobile penetration test, it’s necessary to have a rooted device. This allows you to run commands, view logs, and modify the application at the root level.
This is a step by step process on how to root a Google Pixel 4, the same step applies to Pixel 5 (Redfin). (Maybe it can work on Pixel 6 but I have not tried it).
Step 1 — On the Pixel phone
- To become a developer, go to “About Phone” and click “Build Number” seven times.
- Enable “USB Debugging” under “Developer Options”.
- Connect your phone to your laptop and make sure to use Google Chrome.
Step 2 — Flash the Android Device.
Flash the Android to ensure the image is right.
Links;
Flash with Android Flash Tool | Android Open Source Project
i. Click on the link , Allow ADB Access and select the device.
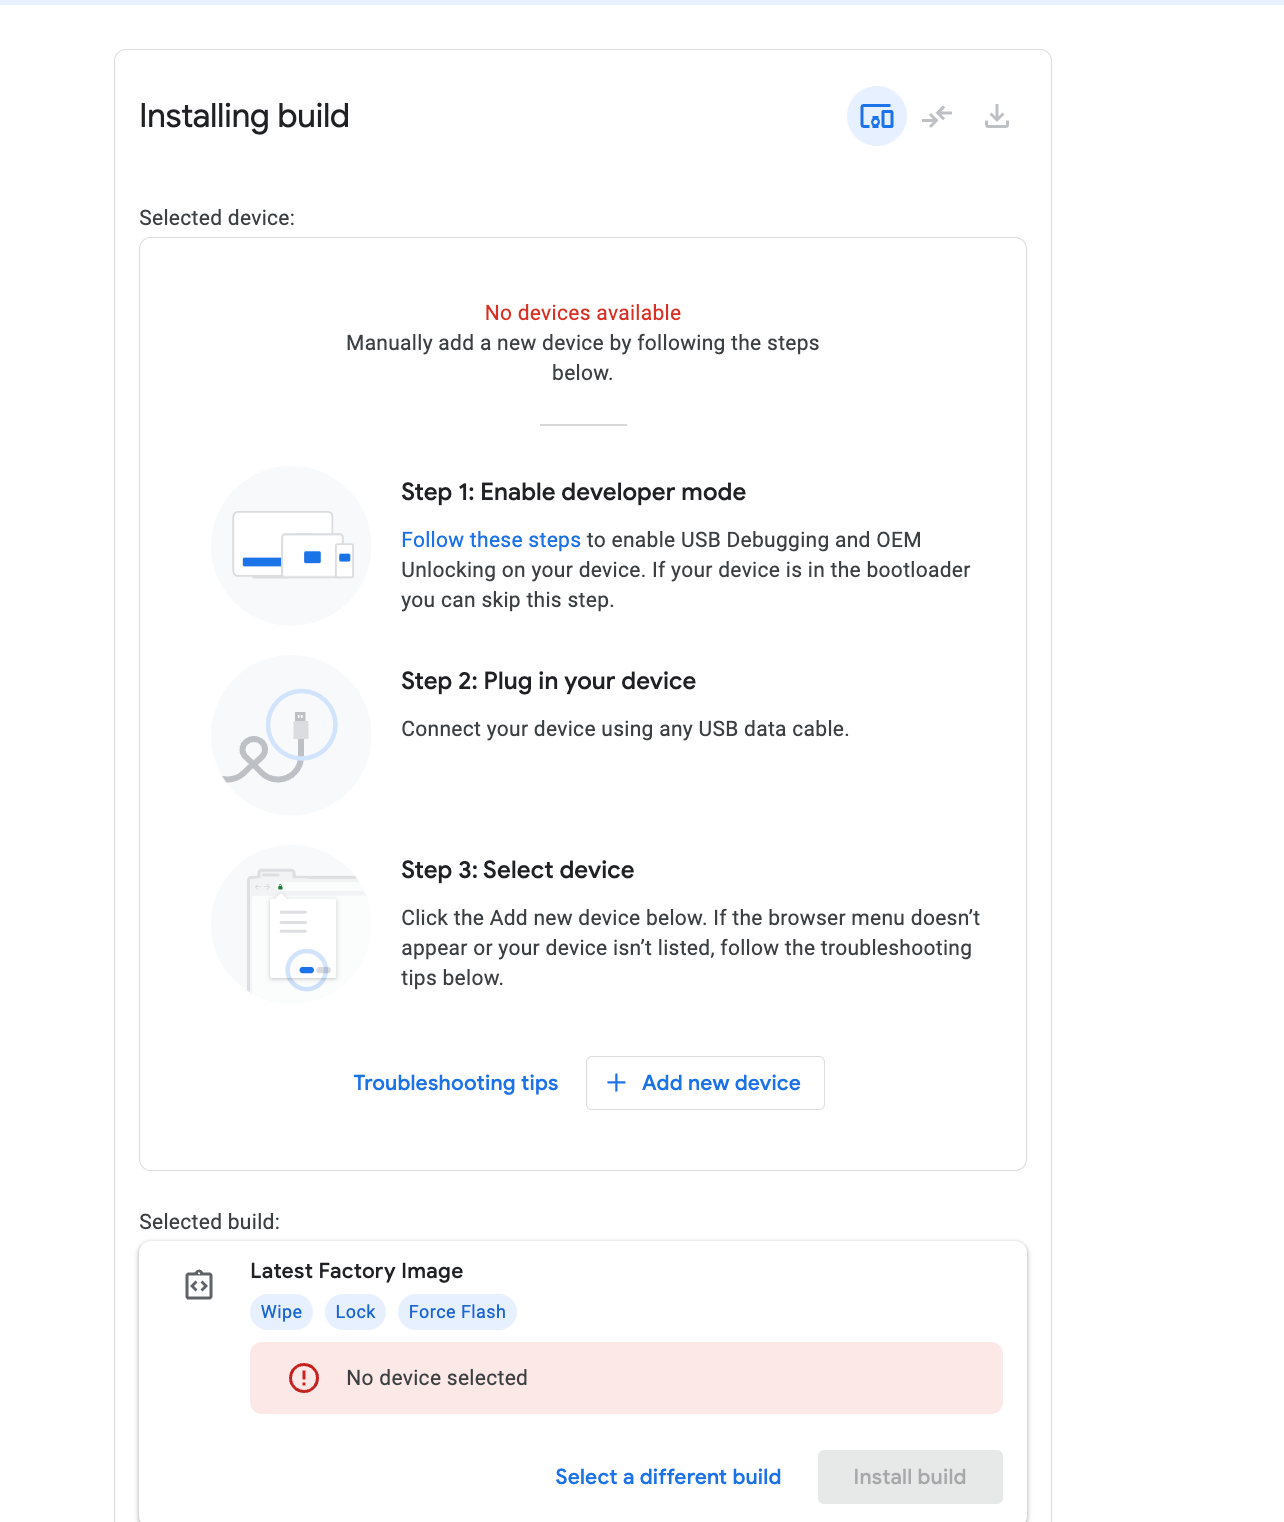
ii. Select “Build”.
Ensure the build matches both the Android version and Pixel version of your phone, then proceed to “Build”. This process may take some time.
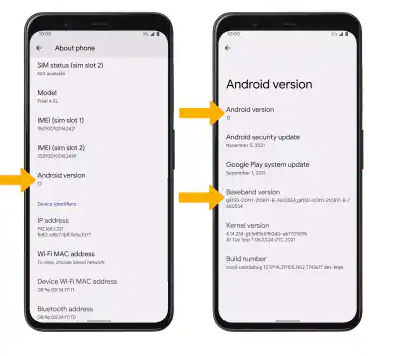
Step 3 — Boot Image.
- Download the boot image.
You can do this by clicking on the first item in the menu at this link: https://developers.google.com/android/images
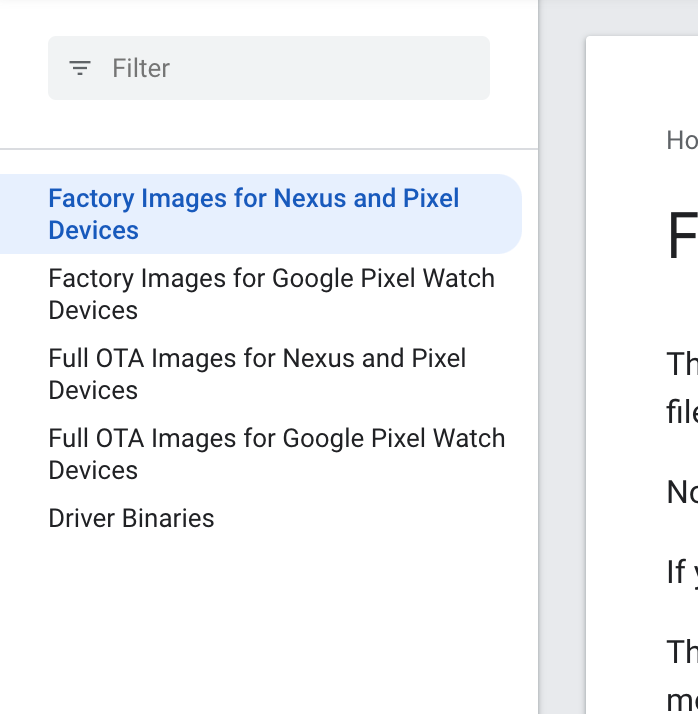
If it prompts you to sign in, do so and proceed to the specific image.
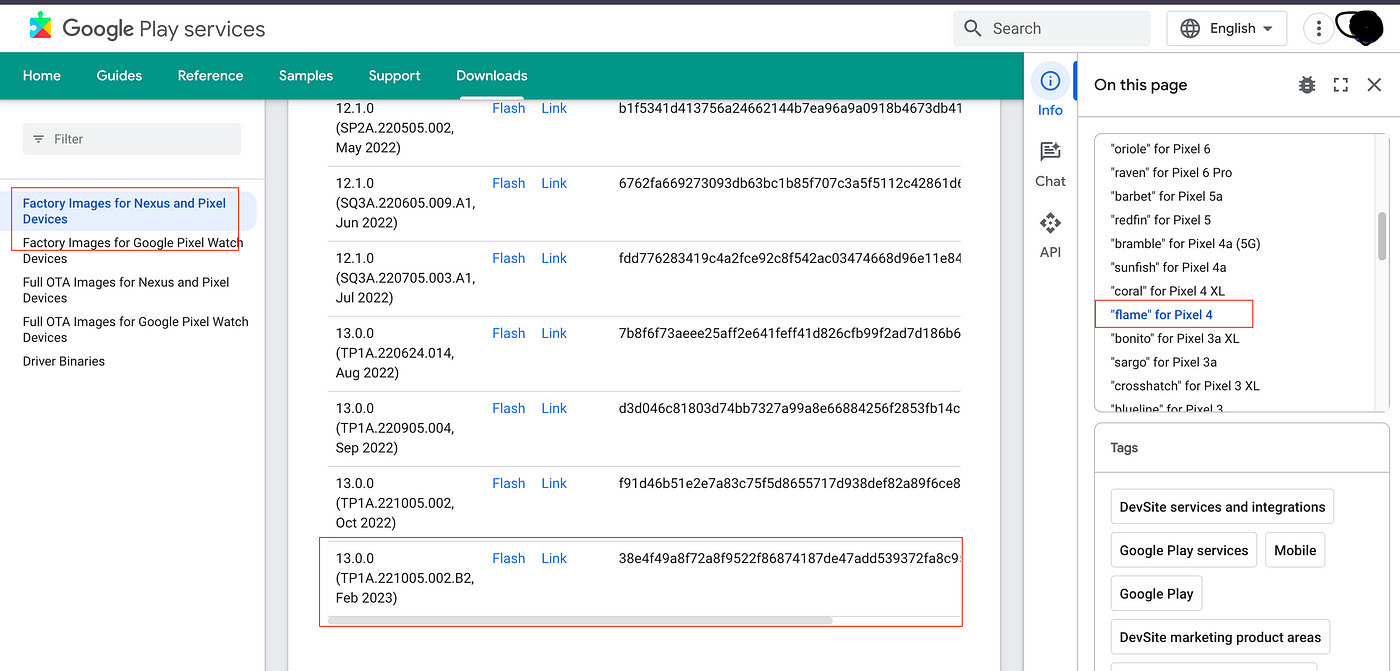
Download the file to a suitable folder (be aware that this may take some time).
b. unzip the file
First, extract the downloaded file named ‘flame-tp1a.221005.002.b2-factory-38e4f49a.zip’. This will create a new directory ‘flame-tp1a.221005.002.b2’ containing several files, including ‘image-flame-tp1a.221005.002.b2.zip’. Extract this file to obtain the ‘boot.img’ file.

Ensure the file is boot.img
For any tool installation refer to https://medium.com/@vivian.kfrost/android-penetration-testing-the-tools-d25970107d92
Step 4 — Push Files to Android Device:
- Push the boot.img to /sdcard/Downloads on your Android device using the following command:
**adb push boot.img /sdcard/Downloads**
2. Install Magisk on the Android Device
- Download Magisk from; https://magiskmanager.com/
- Push the downloaded Magisk installer (
Magisk-v27.0.apk) to the device using ADB:
adb install Magisk-v27.0.apk
3. Magisk App steps
- Open the Magisk App on your Android device.
- Click on “Install” to begin the installation process.
- Select the “Patch File” option and choose the
boot.imgfile from the Downloads folder. - Follow the on-screen instructions to complete the patching process. Once done, the app will confirm with “This is done.”
Step 5 — Flash boot and unlock
- After patching, a new file named “Magisk” will be added to the Downloads folder on your phone.
- Copy File to Temporary Directory
Since pulling files from /sdcard/Downloads/ requires root access (similar to what we are doing on the phone), copy the file from /sdcard/Downloads/ to /data/local/tmp
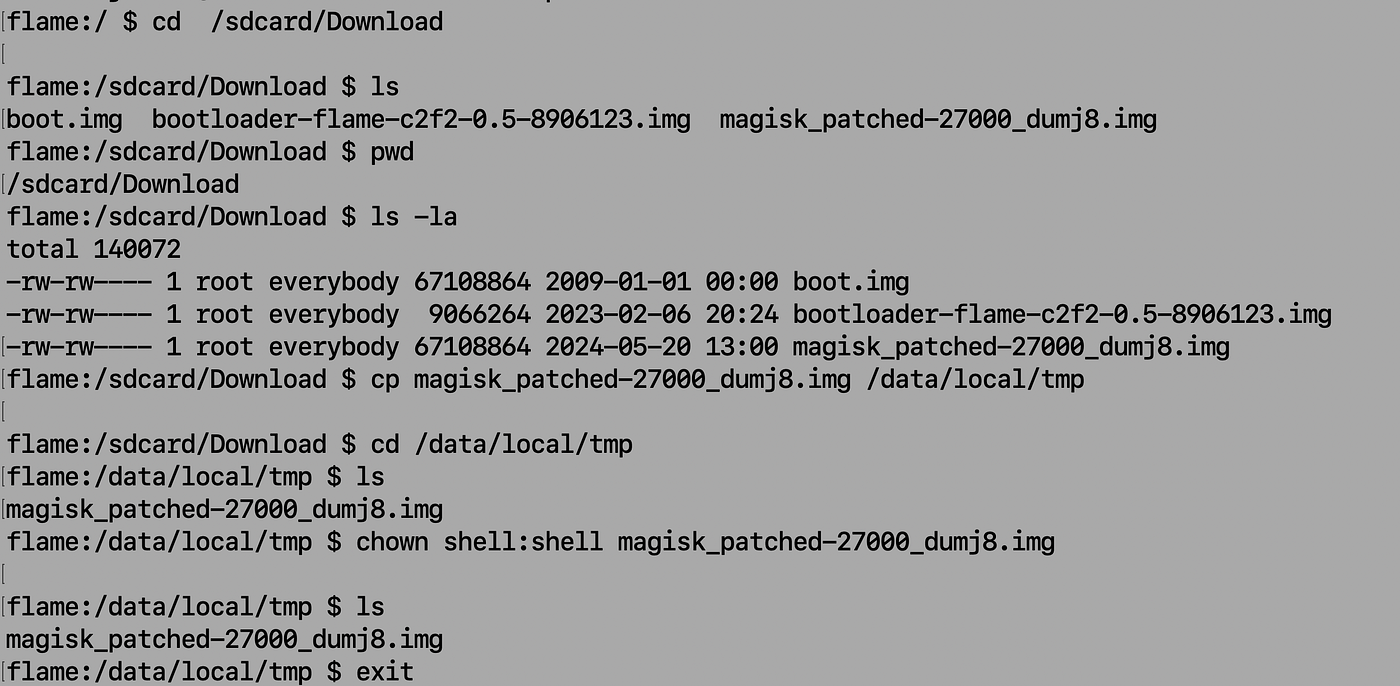
3. Pull the Patched File to Your Host Device (Laptop)
Use the following command to pull the patched Magisk file from your Android device to your host device (laptop):
adb pull /data/local/tmp/magisk_patched-27000_dumj8.img
4. Prepare Device for Bootloader Mode:
- Disconnect your phone from the host device.
- Shutdown your phone.
- Press the volume up and power button simultaneously to enter bootloader mode.
- In bootloader mode, use the volume down button to navigate to the desired option.
This will launch the bootloader interface.
5. Connect the Device to the Host Device via USB:
- Connect your Android device to the host device (laptop) using a USB cable.
Run Fastboot Commands:
- Open a terminal window on your host device.
fastboot flashing unlock # This command attempts to unlock the bootloader (optional).
fastboot flash boot magisk_patched-27000_dumj8.img # Flash the patched Magisk file to the boot partition.
fastboot reboot # Reboot the device.
Note: The fastboot flashing unlock command may or may not work depending on your device's bootloader status and manufacturer restrictions. It's optional and may not be necessary for flashing Magisk.
Lastly check if this worked

IT WORKED!!
Resources ;